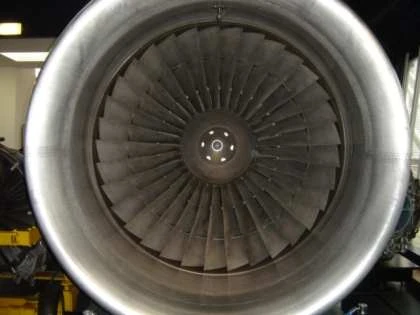
Originally posted on YSFHQ.com by Lucas on 18 March 2012
Creating a Turbofan in GepolyO[]
Well, I'll start by explaining what a turbofan.
Turbofan blades are those who stay at the turbine inlet, sucking air into the pre-compressor, and some people do not know the "trick" for how to make there, and end up stealing from other existing and resizing.
But that's not interesting at times, use a turbofan that was a 747 and put him in a Learjet 45 resizing it will get ugly, then what could be done, would make a new one according to what you want, but if you think that has no visual or mathematical precision to make a correct and circle the pads, do not worry.
Well, we will do the turbofan is almost like this:
And you'll see that there is nothing difficult, you could have done as fast as writing a TAM.
Opening GepolyO ...
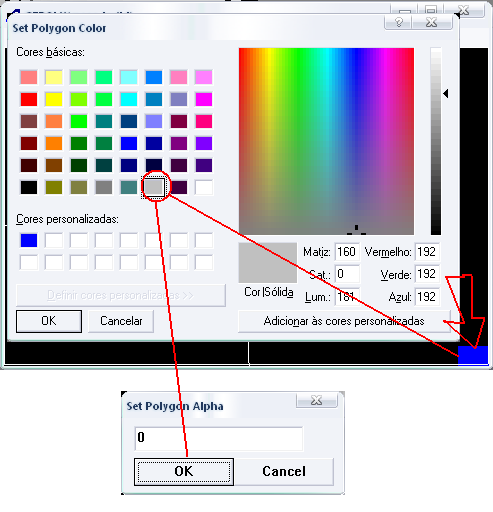
First select a gray color so we can do it without having to go back and repaint it.
Polygon Set the alpha appears, is nothing more than the place for you to select a transparency, in this case 0 is none.

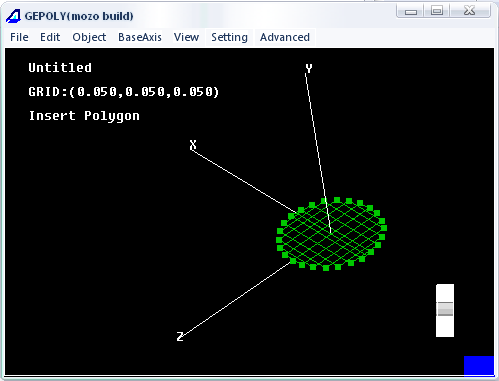
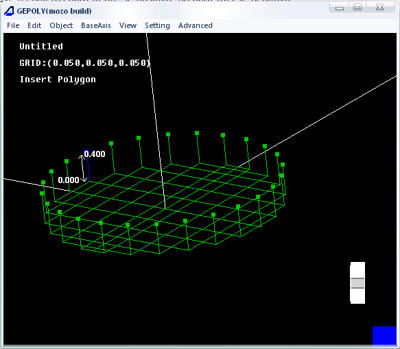
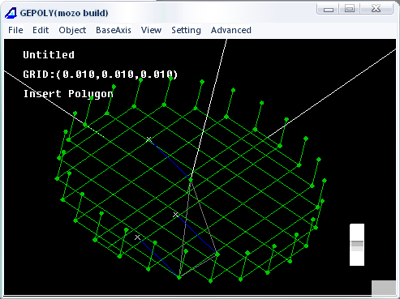
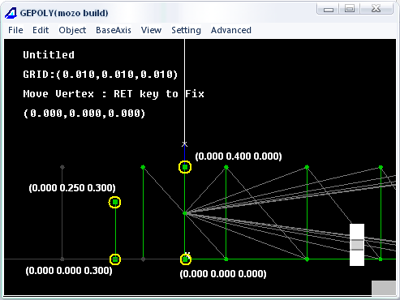
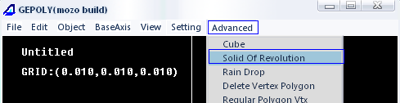
Well, once you open the GepolyO to do something, you immediately think of going on the menu OBJECT> INSERT VERTEX V or key, but not for this, now you will ateh menu ADVANCED> VTX REGULAR POLYGON, like the image below.
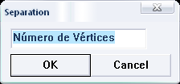
Now select an axis and click on it, a box will appear with the title of "separation" in this box you must select a number of vertices of its turbofan, ie, how many vertices will have the circle to be created.

{Number of Vertices}
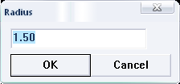
To imagine that this turbofan 26 is a good size, then you should put in that dialog box, the number 26 and give OK.
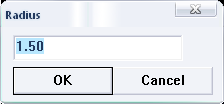
Then will come another dialog box with the title "RADIUS", which is the total radius of the turbofan, or circle that will be created in this case we use the number 1.50.
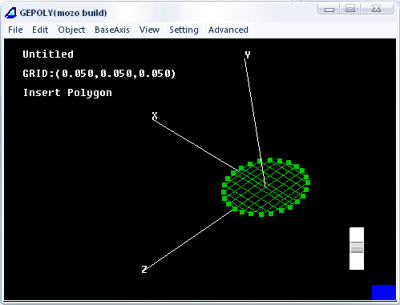
Okay, so you already get the following result, who is a tight circle formed by 26 vertices within a radius of 1.50
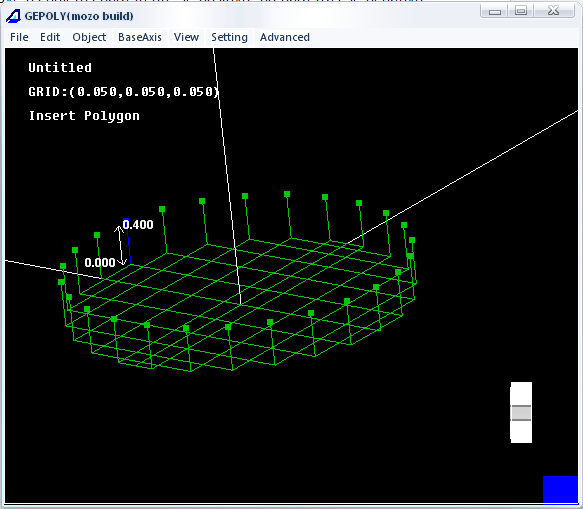
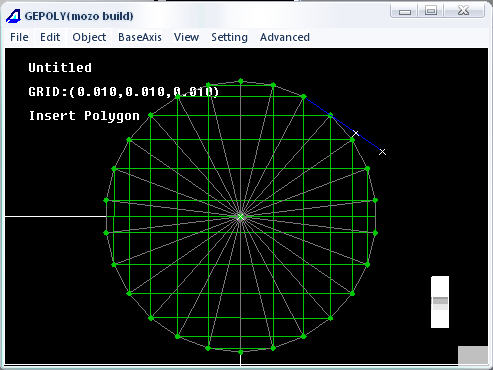
Well, did not end there, because you will have to move it up a bit, and create another circle like this so it can be magic!
Now go to the menu EDIT> MOVE ALL, and in the box that appears will have three choices of direction to where you can move it:
X axis:-move objects to the right if positive, or left if negative.


Y axis:-move objects up if positive or down if negative.
Z:-move objects forward if positive, or backward if negative.
In this case we will use the axis is the Y axis, and will use the value 0400, since I'm using decimal precision of 3 digits after integer, ie, after the comma will have three decimal places.
When you press OK, you will realize that this very second, the vertices that were at the point 0 of the three axes, it is in section 0.4 of the Y axis, and you can now create another circle in the same measures.
Well, let's again, ADVANCED> VTX REGULAR POLYGON, enter 26 in the separation and give OK, then set the Radius to 1.50 and Ok again.
When finished you will have just such a result:
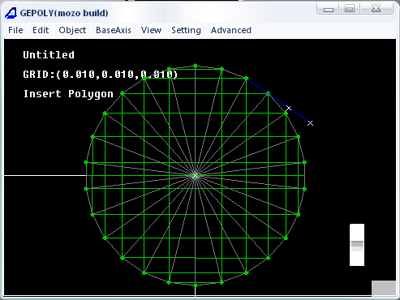
Well, the tips of the blades we have, but the center, we have to make a single vertex, right in the middle of it all, pretty easy.

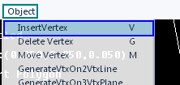
Now I go to Menu OBJECT> VERTEX INSERT, or just hit V
And let's put this vertex to the center of the turbofan because it is also the center of rotation, but as the standard is 0.5 Gepoly guide, as we centralize it in a beam that has a thickness of 0400, leaving just the Y.
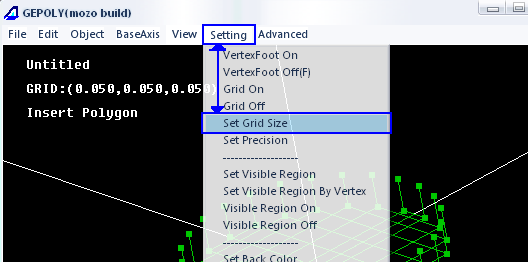
Well, then we'll have to resize the tab, going to the menu SETTING> SET GRID SIZE
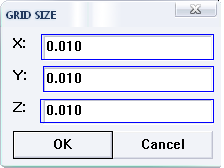
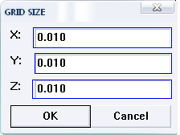
You will get a dialog asking the size of the tabs X, Y and Z, and you will set the size of 0010 in both the X, Y and Z as in, so you can reach the point Y 0020 tab to enter the central vertex.

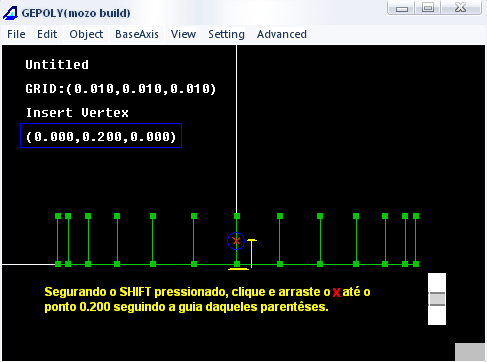
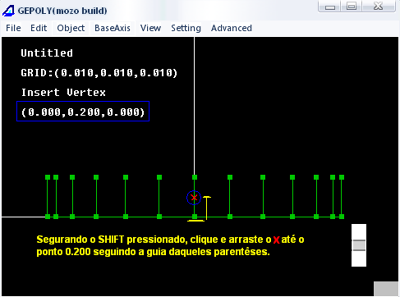
Okay, now part of redoing the menu go to OBJECT> VERTEX INSERT or key V, will appear in the center of these guides a red X, and you must press F1 to get a front view and holding the SHIFT key, click the click on the X, and holding the mouse clicked tab climb Y, you will see that X went on his mouse movement, take him to the point of the 0200 guide Y, as shown below.

[Holding down SHIFT, click and drag to the point X 0200 following the guidance dqueles parentheses.]
Ready after you have placed the X in the correct position for 0200, press ENTER, and you'll see that X is a square tanformou green like the others, this is the central vertex.

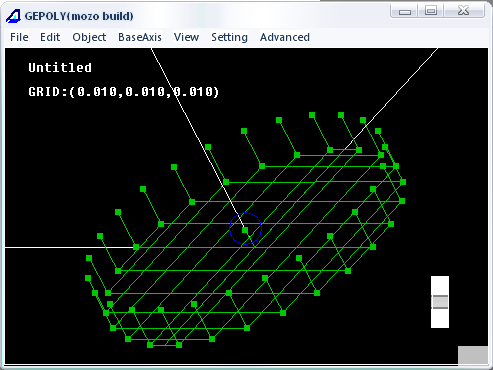
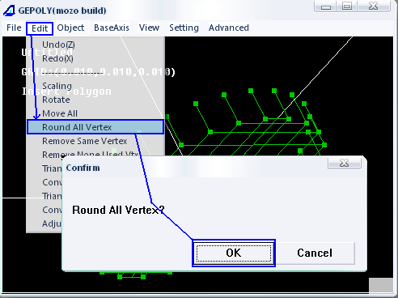
Now let's leave them to get smoother polygons, going to the menu EDIT> ALL ROUND VERTEX, they should turn the squares into balls.
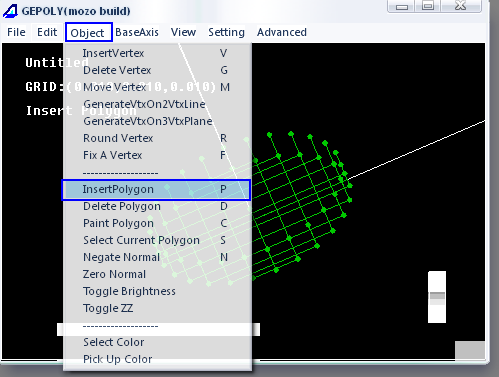
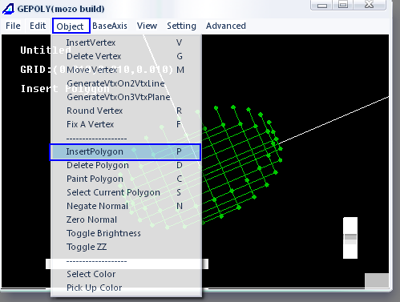
Well, now let's create polygons, which serves to make visible the blades, you will create them by going to the menu OBJECT> INSERT POLYGON.
Some people can not create polygons, because they do not know how to assign to the vertices.
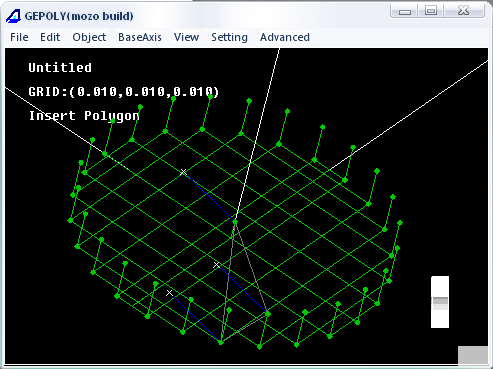
To insert a polygon, you have to click the mouse on each vertex you choose, and to set the polygon, you must give ENTER, but not only that, the last corner, you need to double click, or triple, to handle the viewing stand to the side that you want this to be Visited polygon, ie, in our market, it must be seen from above, so let's leave the handle up view of the polygon, as in the image following:
The handles display, for those who could not understand, are the straight blue with a white X on the end.
You must pull the top edge of the polygon of a string to the tip of the next lower sequence and binds it to the central vertex, giving him multiple clicks to display the handles appear on the correct side, ie upwards.
Speak with all this, then press F2 to view it from above, and let your like mine below:
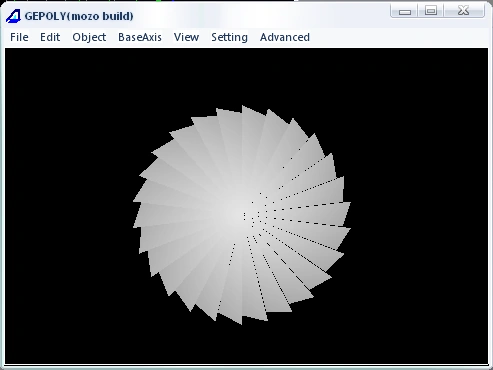
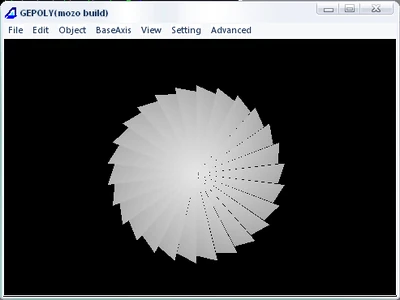
Now you will hit F8, and you will see that all this work has already borne fruit, which is already looking like a Turbofan, but there is still something missing that center of the turbine rotor, good, to do so we have to use another tool that is in the ADVANCED, before it was used only to shape the beginning of the fuselage, but we know that its potential would not stop there.
Go back to edit mode by pressing F7.
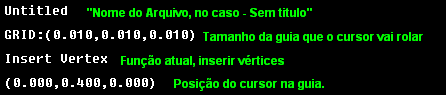
So let's see if you already understand the basics of GepolyO, and putting it in view of F3, insert a vertex at position 0400 of the Y tab in the center, another corner of the tab at position 0300 Z (forward / backward), with position 0250 of the tab Y.
To move to the sides, just hold the mouse clicked, you will only use the mouse clicked with the SHIFT when you move the Y axis

So let's see if you learned to look at the report the cursor position (X red vertex), have to create by following the coordinates below for such vertices, always looking pro inform the cursor position in the guide.
Create these vertices:
(0000 0400 0000) - Highest Point
(0000 0250 0300) - Side 1
(0000 0000 0300) - Side 2
(0000 0000 0000) - Central point of absolute axes.

Then if you can they will be doing so if you can not try again.
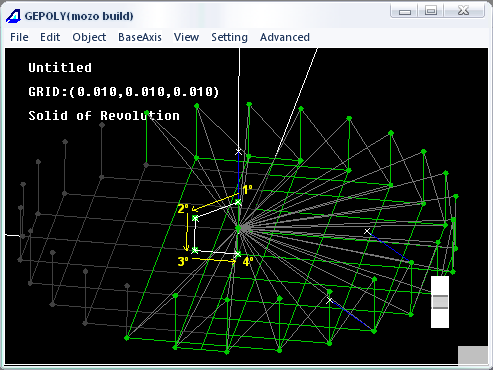
Well, now let the magic of "SOLID OF REVOLUTION", click on the "ADVANCED" and select "SOLID OF REVOLUTION."

And click on the vertices that are not yet suavisados, which are still square, but then in this order:

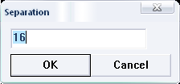
By clicking on the last corner down there, press ENTER, and appear again the dialog box separation, that you should put the value 16, as shown below:
and to OK.

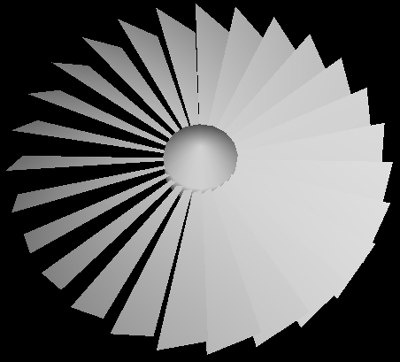
To create the beak of this turbofan blades, now, you should soften it too, going to the menu EDIT> ALL ROUND VERTEX, confirming by pressing the OK button, and then pressing F8, this is the result you get:
If you made it this far, congratulations!
You have finished creating your turbofan, which can be used in various types of aircraft, including can tailor it to the legacy of the Owl.
There are several ways to modify these steps for you personasar even more after you finish doing this, a new start experimenting and go, and enjoy even more tools to meet Gepoly.
Additional Information[]

{Holding down the SHIFT key, click and drag to the point X 0200 following guidance from those brackets.}
Untitled "File Name, in the case - Untitled "

GRID:(0.010,0.010,0.010) Size guide that will roll the cursor.

Insert Vertex:Current role, Insert Vertices.

(0.000,0.400,0.000) Position the cursor on the tab.

